Getting started with basic browser automation
# Install the Axiom Chrome Extension
Axiom requires a Chrome extension to build automations.
The Chrome extension can be added by visiting the Chrome Store page, here (opens new window), and clicking "Add to Chrome".
# Install the Desktop Application (Optional)
You can optionally run your Axiom on your own computer by downloading our desktop application.
The installer for the Axiom desktop application can be downloaded by visiting this page (opens new window) and clicking the download button.
Once the installer has finished downloading, run it to install Axiom.
Once the installation process is finished, you will need to start the application. The Axiom desktop app has to be running to use all of Axiom's features.
# Open and close Axiom
To get started with Axiom, check for the axiom icon in the Chrome toolbar, which is in top right corner of your browser:
![]()
Click on the robot arm icon, as indicated, to load Axiom into the page and start working!
To remove Axiom from the page again, click the icon in the Chrome toolbar a second time.

# Use the Axiom dashboard
The Axiom dashboard is where you can see an overview of all of your automations.
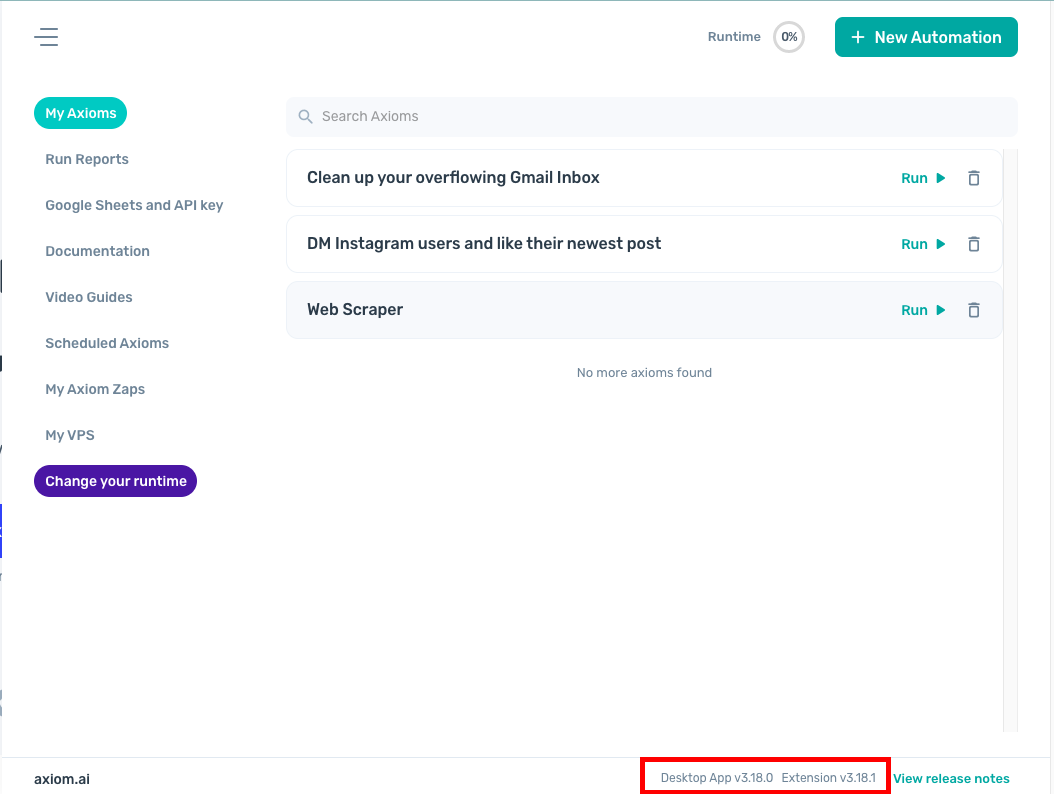
To the bottom is a status message. This will show you if the Axiom desktop app is running and up to date. If the app is running, the following message appears:
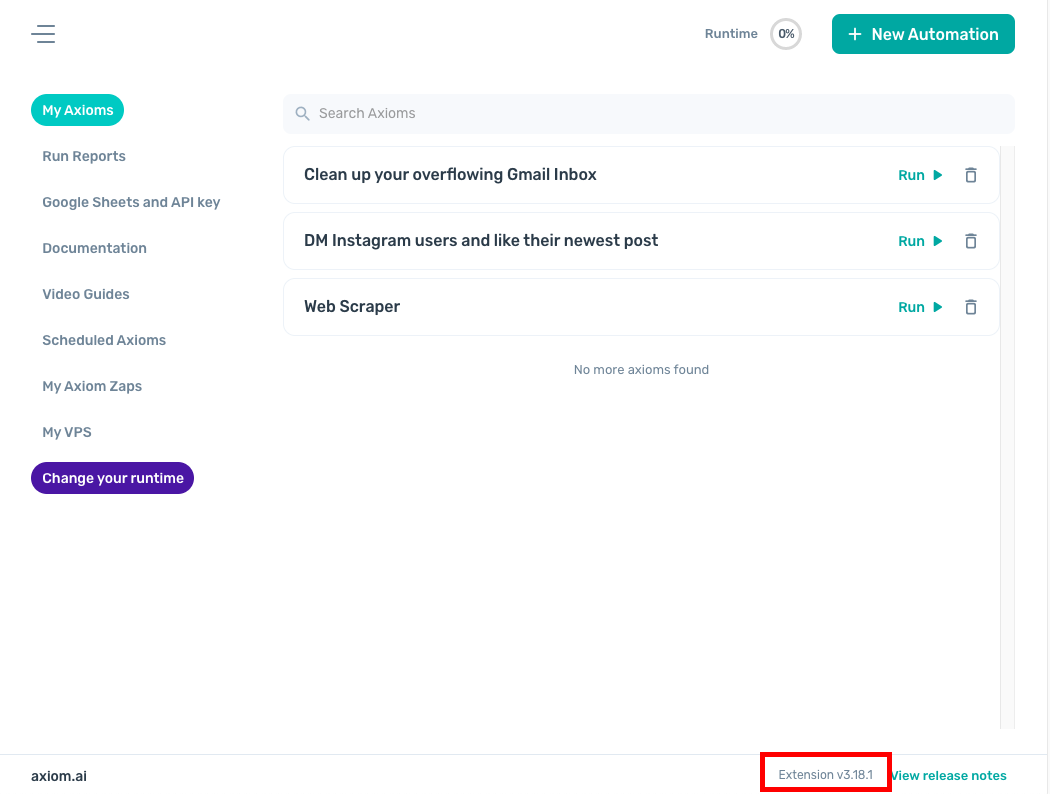
If the app is not running, it will look like this:
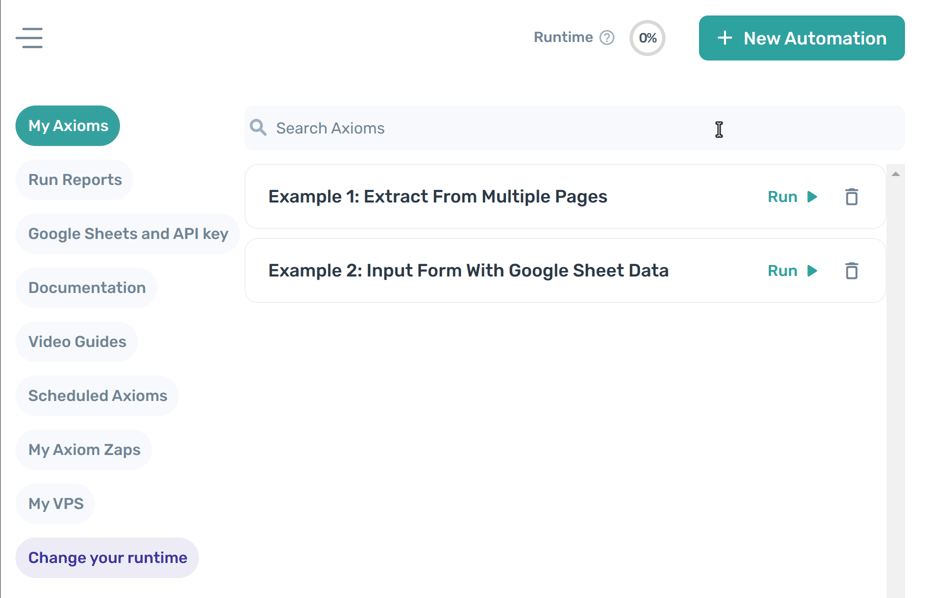
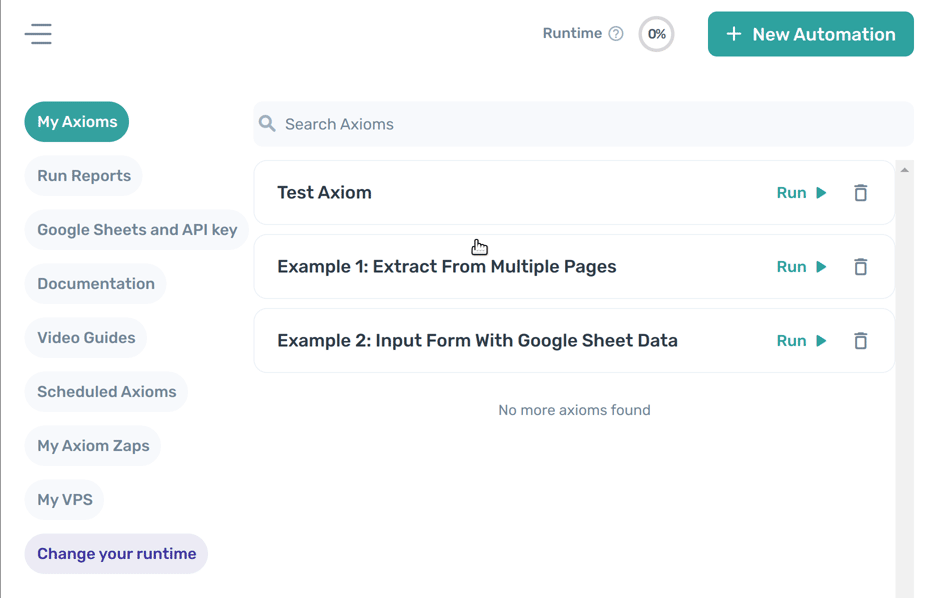
To the right is a listing of all the automations that have been created. To start with, your account will contain few example axioms, which you can try running to see how axioms are built and how they work.
On the left is the main navigation.
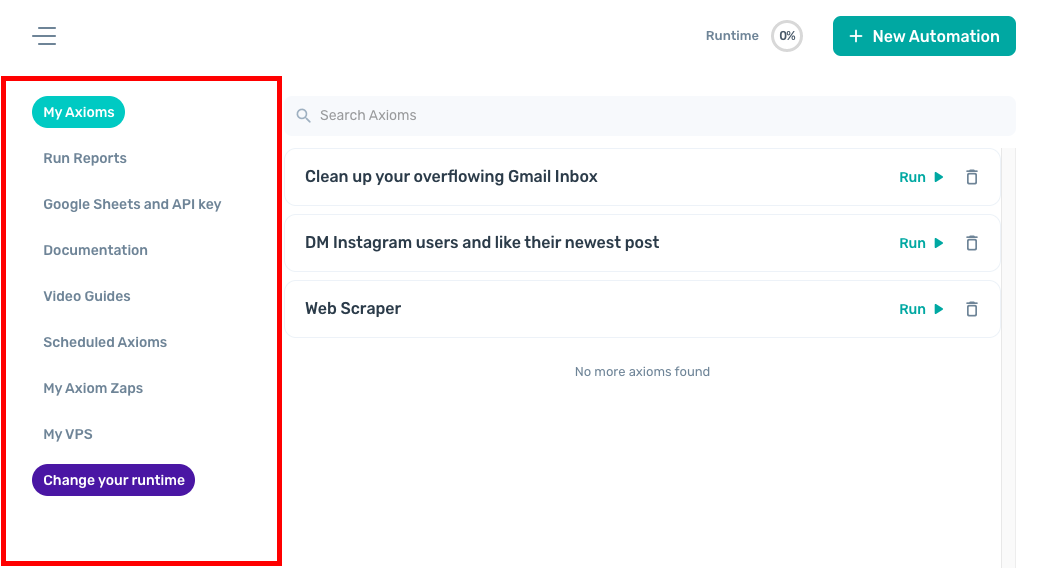
- My Axioms - Automation listing page
- Run Reports - See a report of Axioms that have run, and any errors that were encountered
- Google Sheets and API key
- Documentation - This page you're reading!
- Video Guides - See training videos and recipes / templates
- Scheduled Axioms - Overview of the scheduled Axioms
- My Axiom Zaps - List of Axioms linked to Zaps
- My VPS - Virtual Private Server (VPS) Access page
- Change your runtime - Subscription management page
If the (optional) Desktop app is running, its status will be shown in the footer. You'll receive a warning if the desktop app is out of date.
# Create a new Axiom
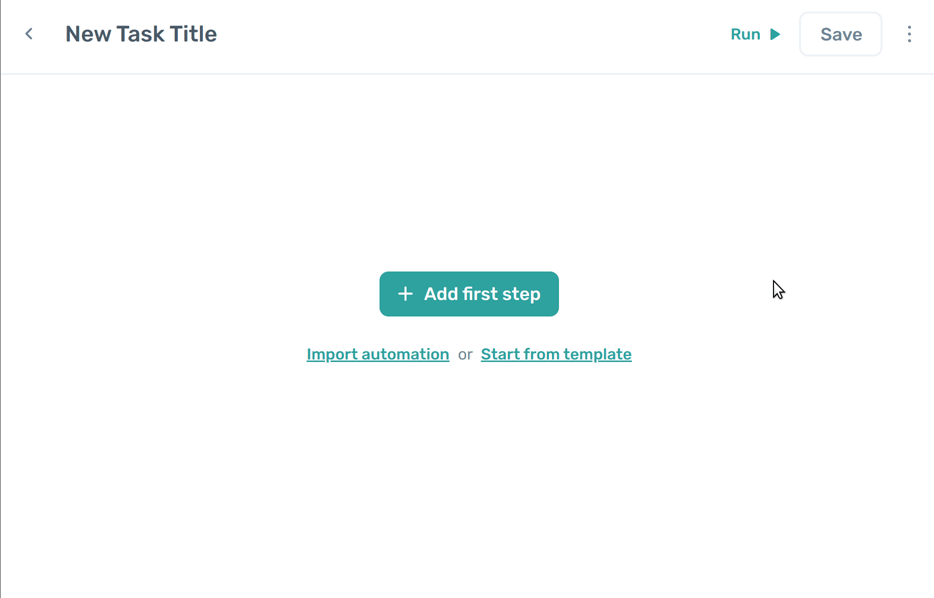
From the main menu, click "New Automation" to open the builder.
From here, you can "Add first step", "Import Automation" or "Start from template".
A template will pre-load a set of steps for you, which then should be edited for your particular needs. Looking at these can be helpful as examples of how Axiom works.
Clicking "Add first steps" lets you start from scratch, or use one of several Beginner snippets to get started.
You can edit an existing Axiom by clicking on the title or anywhere within the Axiom row to proceed.
When creating a new Axiom or editing an existing one, you can always go back to the dashboard by clicking on the arrow in the top panel next to the title:

Learn more about building Axioms from scratch here.
# Add first steps
Automations in Axiom are built by linking together a series of steps to create a custom workflow.
Each step performs some useful task on its own, and can then be connected to any other step. Examples of steps provided by Axiom are:
- Reading to and writing from Google sheets
- Web scrapers, allowing you to retrieve data from web pages
- UI automation bots, which allow the computer to automatically interact with a website. Here you configure sub-steps that instruct the bot where to click and what to type.
- Webhook integration, which allows Axiom to trigger API events in other applications
- Filters, which allow you to modify data according to certain rules
- and many more!
To add a step at the end of your Axiom, click the "+ Add step" button. To add a step between existing steps, hover over and click the 3 dots that appear in the middle.

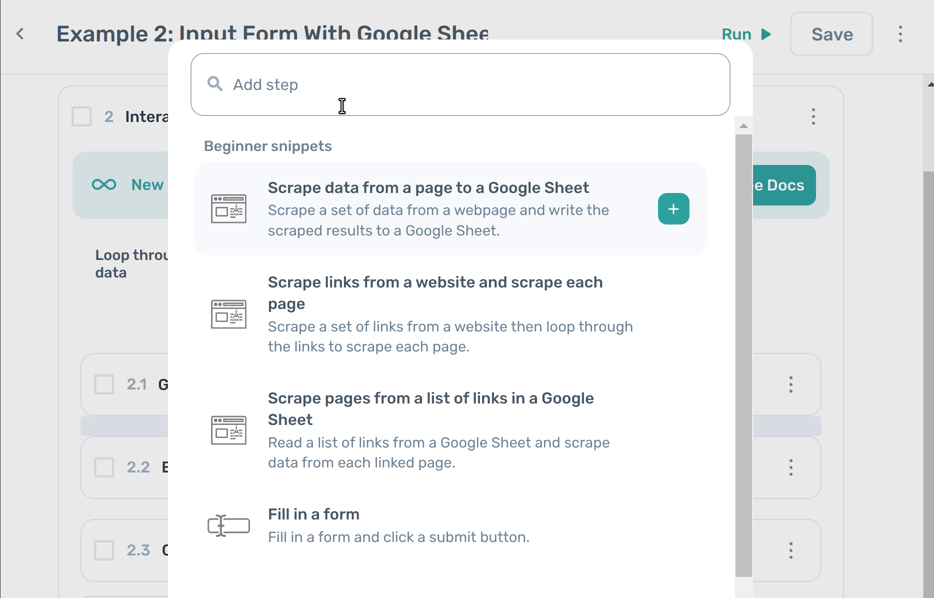
The step finder will open. Use the Search bar to find a particular step. If you have something in mind, try typing it in - we may well have something already set up for you!

Alternatively, you can browse the list manually to see the full range of what Axiom offers.
Click on a step in the list to add it to your automation:
You then just have to fill out the required fields, and the step is set up and ready to go! More information about each step can be found in further documentation, below.
Press “Save” to save the changes.
# Use beginner snippets
Beginner snippets are the most common combination of steps when getting started with axiom.
You can use snippets like Fill in a form or Scrape data from a page to a Google Sheet to get started building your bot.
# Pass data between steps
Axiom allows steps to send data to each other. This is a very important feature for building useful automations.
In the header of many steps, you will see a yellow token with a plug icon, like this:

This indicates that this step produces data when it runs - for example, an "Extract data" step will have the results of a web scrape stored as data for use later.
Many steps allow you to input data outputted from another step. When this is possible, you will see a dropdown, like this:

The options on the dropdown correspond to the steps that output data. Just select from the list and that data will be used in the step instead of a hard coded value.
A common example usage of this is writing scraped data into a Google sheet, which we will go into in more detail in the Using Google Sheets section.
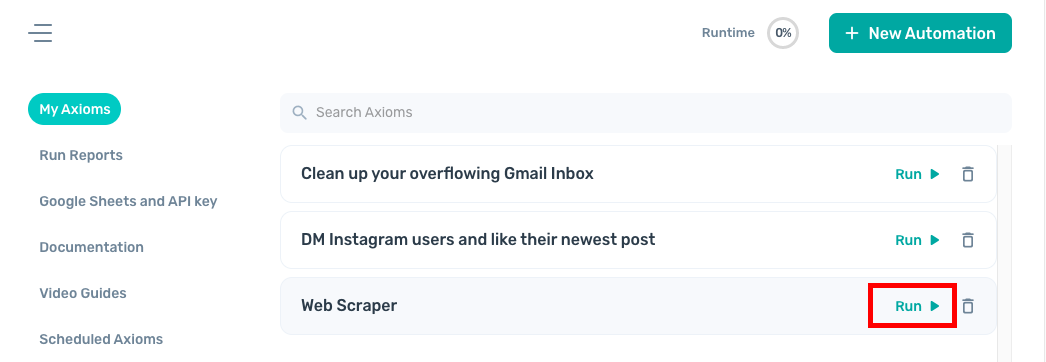
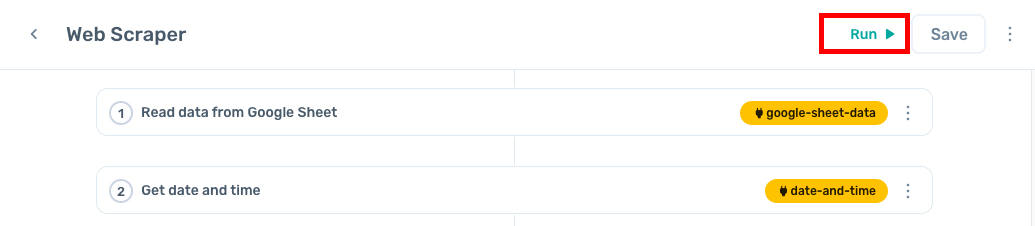
# Run an Axiom
There are two ways to run an Axiom.
Click the Run button next to the Axiom's row on the dashboard:
Click the Run button in the builder when creating or editing an Axiom:
After clicking the ‘Run’ button, choose if you would like to ‘Run in cloud’ or ‘Run w/ desktop App’.
If an Axiom is running, the button will turn red and show a "stop" button with an icon. Clicking it stops the Axiom.
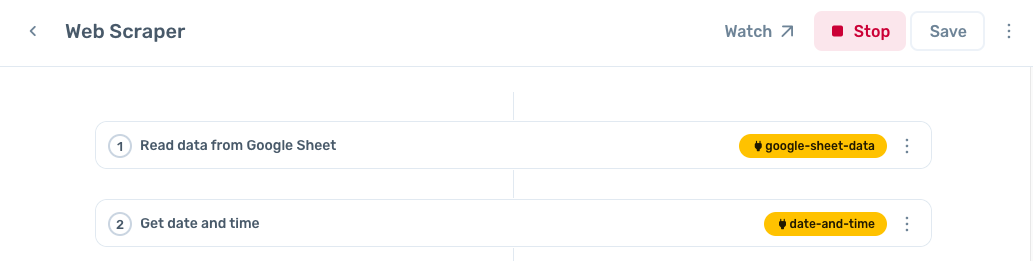
Once your automation starts running, you will see a window open up and you can watch the bot complete your steps. When running via the cloud, you can see on the left sidebar which step your bot is currently on and how long each of the steps has taken so far to complete.
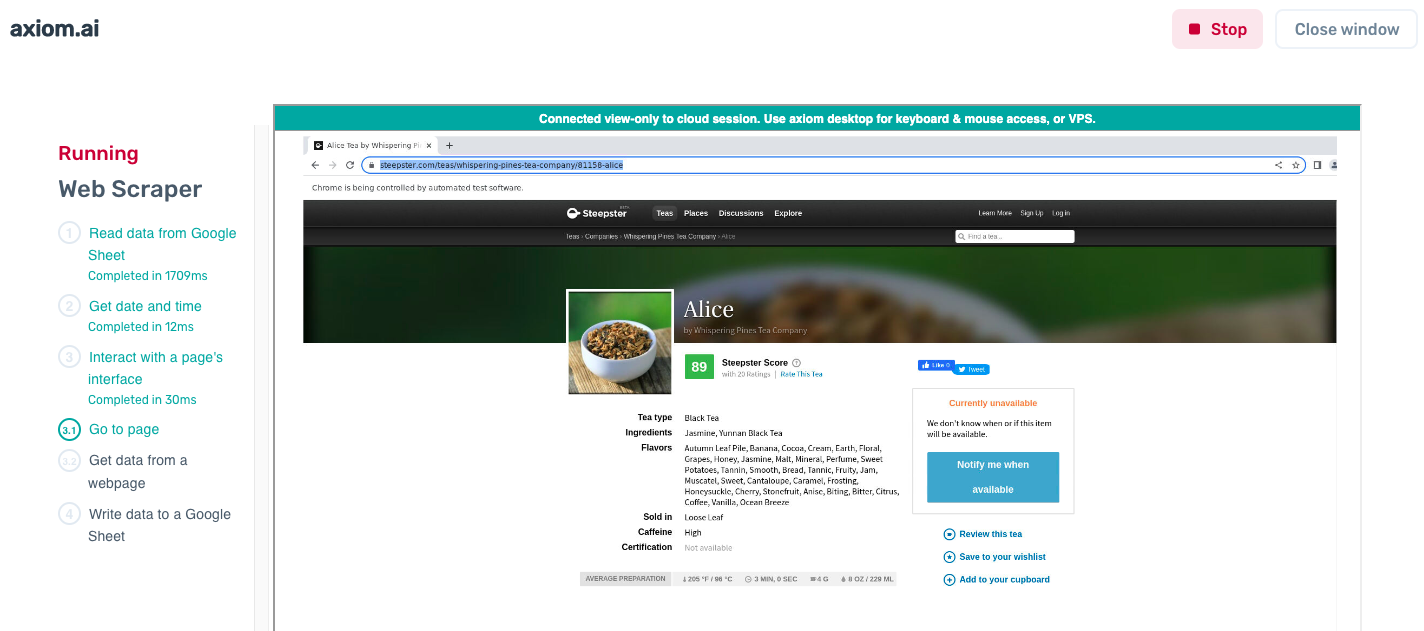
If the bot hits an error, it will show you a message to help you debug what's wrong.

# Share and import an Axiom
Click into the builder for an Axiom by clicking on the Edit button in the dashboard, or by creating a new Automation.
Advanced options for Axiom are available from the bar at top, which can be opened by clicking the three dots menu at the side of top bar and then choosing the “Settings” option.
To download your Axiom, follow the steps below:
- Open your Axiom
- Click on the three dots menu in the right upper corner
- Choose “Settings”
- In the left panel click on “Import/Share”
- Press “Download” button
- A .json file will be saved to your default downloads folder.
Another user can then import this file to run or continue work on this Axiom.

To import a file you have been sent or have previously downloaded, follow these steps:
- Create a new automation
- Click on the "Import" button
- A file browser will open, allowing you to select the Axiom you want to import. Select the file you wish to import.
- Click "Import"
- When importing the file into existing automation, Axiom will warn you that importing the template will override what is currently loaded into the builder. Click "Confirm Import" to load the Axiom.
# Delete an Axiom
To permanently delete an Axiom:
- Navigate to the Dashboard.
- Press the “Delete” trash bin icon.
- Click “Confirm” to proceed with the action.
The deletion cannot be reverted.
You can also delete an axiom from within the builder. Click on the menu item in the top-right, then click "Delete". Again, this action is irreversible, so you will be asked to confirm.